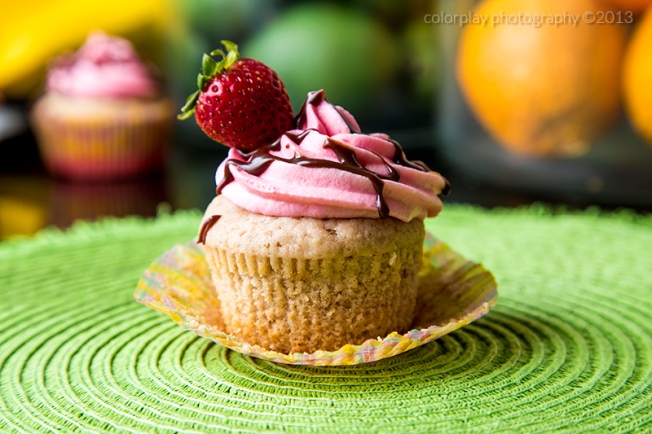
Strawberry Cupcakes with Strawberry Cream Cheese Frosting

Standard

And a chocolate drizzle for your added eating and viewing pleasure 🙂

We had some strawberries sitting around lonely in our fridge, and I thought – there has to be something tasty I can make with these.  So I started poking around the internets and came across a really yummy sounding Strawberry Cupcake recipe.  And then my mind went to one of my daughter’s lunches last week, which happened to be a strawberry and cream cheese sandwich (one of her favorite things, and the reason for the lonely strawberries).  So what did I do with all that brain power (or lack thereof depending on the day)?  I made a Strawberry Cream Cheese Frosting, of course!   And then as I sat there looking at that pink decadence, I thought, the only thing that could top this would be some chocolate.  So I added that too for good measure 🙂

The cake is super tasty, not overly strawberry-laden, just enough to get that hint.  But then the frosting hits your taste buds and there’s no going back.  Definitely worth a try if you’re a strawberry lover.

strawberry cupcake

The Recipe (adapted from here):

  • 2/3 cup whole fresh or frozen strawberries, thawed
  • 1 1/2 cups all-purpose flour, sifted
  • 1 teaspoon baking powder
  • 1/4 teaspoon coarse salt
  • 1/4 cup whole milk, room temperature
  • 1 teaspoon pure vanilla extract
  • 1/2 cup (1 stick) unsalted butter, room temperature
  • 1 cup sugar
  • 1 large egg, room temperature
  • 2 large egg whites, room temperature

Frosting:

  • 1/2 cup (1 stick) butter, at room temperature
  • 1/2 cup cream cheese
  • 1 teaspoon vanilla
  • 2 tablespoons strawberry puree
  • 1 tablespoon milk
  • 1- 1/4 to 1 -1/2 cups powdered sugar

Chocolate Sauce:

  • 1/4 cup heavy cream
  • 1 tablespoon unsalted butter
  • 3/4 cup semi-sweet or milk chocolate chips (I used a combination of both and it came out stellar)
  • 1/2 teaspoon vanilla

The Process:

  1. Preheat oven to 350 degrees. Line a 12-cup muffin tin with cupcake liners; set aside.
  2. Place strawberries in a small food processor; process until pureed. You should have about 1/3 cup of puree, add a few more strawberries if necessary or save any extra puree for frosting; set aside.
  3. In a medium bowl, whisk together flour, baking powder, and salt; set aside. In a small bowl, mix together milk, vanilla, and strawberry puree; set aside.
  4. In the bowl of an electric mixer fitted with the paddle attachment, cream butter on medium-high speed, until light and fluffy. Gradually add sugar and continue to beat until well combined and fluffy. Reduce the mixer speed to medium and slowly add egg and egg whites until just blended.
  5. With the mixer on low, slowly add half the flour mixture; mix until just blended. Add the milk mixture; mix until just blended. Slowly add remaining flour mixture, scraping down sides of the bowl with a spatula, as necessary, until just blended.
  6. Divide batter evenly among prepared muffin cups. Transfer muffin tin to oven and bake until tops are just dry to the touch, 22 to 25 minutes. Transfer muffin tin to a wire rack and let cupcakes cool completely in tin before icing.
  7. Make the Frosting:
  8. Cream the butter, confectioners’ sugar, and cream cheese in your mixing bowl at medium speed.
  9. Add the strawberry puree and vanilla, and beat for 1 minute, cleaning sides as needed.
  10. Add the milk and a little red food coloring (if you’d like a deeper pink color) and beat until completely blended, about 1 minute more.  If the consistency is still slightly runny, add a little more powdered sugar.  Frost the cupcakes using a knife or pastry bag with star tip.
  11. For that added extra finishing touch, make the chocolate sauce:
  12. Place the chocolate chips, heavy cream and butter in a double boiler.  Stir until melted.  Add in vanilla and stir until glossy and smooth.  Drizzle over frosting.
Peach Crisp

Standard

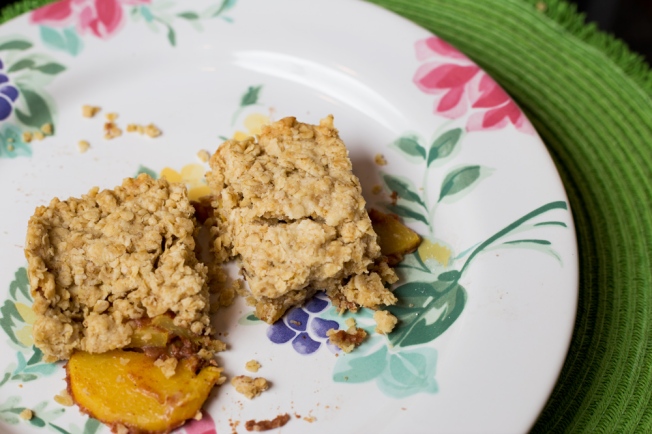
I’ll admit right off the bat, I’m not the biggest fan of peaches.  Let’s call it a texture thing.  I have an even bigger issue with bananas (don’t even get me started on that one!)  Strange part is, I love the flavor of these fruits, but you’d be hard pressed to get me to eat either of them in their raw form.  Add them to a muffin, cake, etc. though and you have a deal.  My husband thinks I’m a weirdo with my texture issues, but, hey, not everyone can be perfect, right? 🙂  I used fresh peaches (tis the season) in this recipe, but you can used canned if you really feel the urge.

The recipe can be made in a cast iron skillet, which would have been great…if I owned one…I, myself, opted for a square baking dish in defeat.  Don’t let me forget to a skillet one to my ever-growing baking wish list 🙂

peach crisp

The Recipe:

5 fresh peaches, peeled, pitted, and sliced (or 1 can unsweetened peach slices)

2 tablespoons tapioca

3/4 teaspoon cinnamon

1/4 teaspoon cloves

2-3 tablespoons white sugar (my addition to the original recipe, it was entirely too tart without it, in my opinion)

3/4 cup (1 1/2 sticks) butter

2 tablespoons brown sugar

3/4 cup all-purpose flour

1 1/2 cups quick cooking oatmeal

The Process:

1.  Preheat the oven to 350 F (325 F if using a dark or glass baking pan in shame, like me)

2.  Place the peach slices, sugar, cinnamon, cloves, and tapioca in a bowl.  Gently stir to coat the peaches.  Scrape the peaches into the skillet (or pan…sigh…)

3.  Place the butter in a medium saucepan and place over medium heat.  Heat the butter until it’s mostly melted.  Remove the pan from the heat and transfer to a heatproof surface.

4.  Add the brown sugar to the butter and stir until smooth.  Add the flour, oatmeal, and remaining 1/2 teaspoon cinnamon and stir together.  Spoon the topping over the peaches and press it lightly with your hands to even it out.

5.  Bake for 25-30 minutes, or until the top is lightly browned.

6.  Allow to cool slightly before serving.  Makes for a great weekend brunch idea!

Flourless Chocolate-Graham Cake

Standard

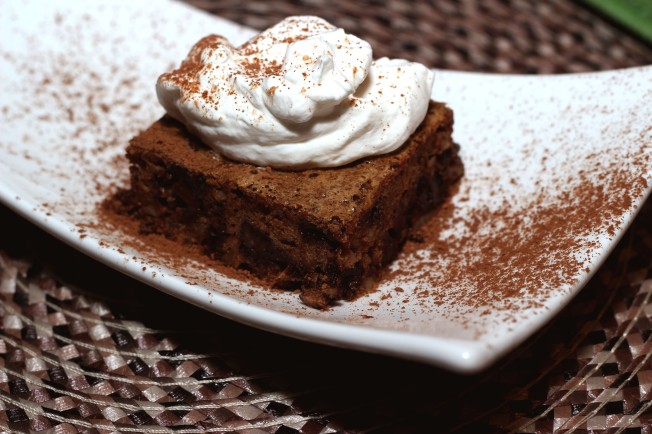
This cake is totally outside of my baking comfort zone.  No flour, no baking powder/soda.  I was half expecting a cross between a pancake and a rock (would that be a hockey puck maybe?)  Needless to say, I was pleasantly surprised when what came out of my oven was actually edible – and really tasty!

The texture is a little more spongy and dense than your average old cake.  But the flavors of the graham crackers, cinnamon, chocolate and walnuts blend so fabulously.  If you’re feeling adventurous, give this one a try.

chocolate graham dream cake

The Recipe (makes one 9″ cake):

1 teaspoon butter (for pan) or baking spray

1 cup semi-sweet chocolate chips

1 cup walnuts or pecans

1/2 cup graham cracker crumbs (6 whole crackers – if you want to try your hand at home made graham crackers see the recipe here)

1/4 teaspoon ground cinnamon

1/4 teaspoon ground nutmeg (I did about 1/8 teaspoon to make sure the flavor didn’t overpower)

5 large eggs, at room temperature

1/4 cup sugar

Sweetened whipped cream, recipe follows

The Process:

1.  Butter or spray a 9-inch cake pan.

2.  Preheat the oven to 350 F (325 F if using a dark pan).

3.  Put the chocolate chips and walnuts in a blender or food processor and roughly chop for a few seconds.

4.  Put the cracker crumbs, cinnamon, and cloves in a small bowl and mix together.

5.  Separate the eggs, placing the yolks in the mixer bowl and the whites in a small bowl.

6.  Add the sugar to the egg yolks and beat on high speed until pale yellow and creamy.  Add the chocolate mixture and mix on low speed until blended.  Add the cracker crumb mixture and mix again.  Scrape down the sides of the mixing bowl once in a while.

7.  Beat the egg whites on high speed until very white and fluffy.  The peaks should stand when you lift the beater.

8.  Using a rubber spatula, scrape the eggs whites over the egg yolk mixture.  Fold in the egg whites by gently moving the spatula in an “S” formation.  Keep folding until all the egg whites have disappeared into the batter.

9.  Scrape the batter into the pan and spread evenly.  Place in the oven for 20-30 minutes or until the cake begins to pull away from the sides of the pan.

10.  Remove the cake and place a cooling rack on top.  Flip the pan and the cooling rack simultaneously and allow the cake to slide out from the pan (cake will be upside down, but wait, there’s more!)  Place your serving dish upside down on the cake bottom, and flip the cooling rack once more and voila – your cake is now right side up on your serving dish.  Hope I didn’t lose many people there…

11. Make the sweetened whipped cream.  Place 1 cup heavy cream, 1 teaspoon vanilla and 1 tablespoon powdered sugar in a mixing bowl and mix on high speed until stiff peaks form.  Make sure not to over-beat and make yourself some sweetened butter!

12.  Serve with a dollop of the whipped cream and a dusting of cocoa powder for that extra “pretty” factor.

Triple-Threat Chocolate Cookies

Standard

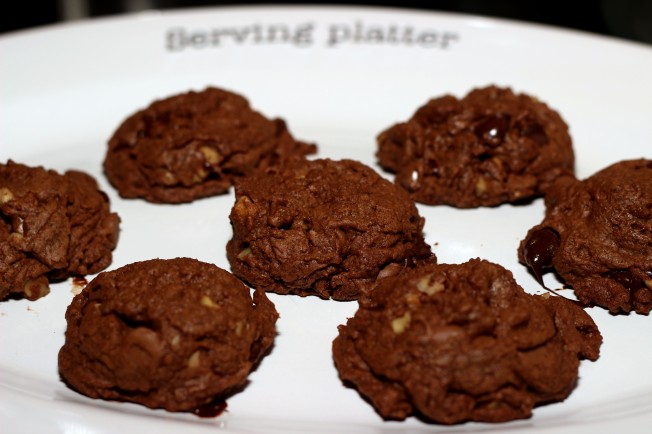
This is my favorite go-to recipe if I’m in desperate need of a quick chocolate fix – I’m sure there are others out there with me 🙂  My favorite part?  You don’t even need to pull out your mixer!  Those extra 3o seconds matter, if you know what I mean.  The original recipe calls for dark chocolate and milk chocolate chunks, but I find in a fit of desperation you can make these with a combo of semi-sweet and milk chocolate chips and still get your choco-bliss on.  Enjoy!

triple chocolate cookies

Recipe adapted from Ellie Kreiger

The Recipe (makes 2 dozen amazingly chocolatey cookies):

1/4 cup butter, softened

1/2 cup dark brown sugar

1/4 cup granulated sugar

1/4 cup canola oil

1 egg

1 teaspoon vanilla extract

1/2 cup all-purpose flour

1/2 cup whole-wheat pastry flour (use can use 1 cup total all-purpose if you don’t have whole wheat pastry flour lying around)

1/4 cup unsweetened cocoa powder (not Dutch processed)

1/4 teaspoon salt

1/3 cup coarsely chopped dark chocolate (2 ounces) OR 1/3 cup semi-sweet chocolate chips

1/3 cup coarsely chopped milk chocolate (2 ounces) OR 1/3 cup milk chocolate chips

2/3 cup chopped pecans or walnuts, optional

 The Process:

1. Preheat the oven to 350 degrees F (325 F if you use a dark cookie sheet or have an atomic oven like me).

2. In a large bowl, mash together the butter and sugars with a fork until well combined. Add the oil and egg and beat until creamy. Mix in the vanilla.

3. In a medium bowl, whisk together the flours, cocoa powder, and salt. Add the dry ingredients to the wet ingredients and mix well. Stir in the dark chocolate, milk chocolate, and the pecans and mix well. Using a tablespoon, scoop the batter onto an ungreased cookie sheet. Bake for 10-12 minutes. Transfer cookies to a rack to cool.

Mini Cheesecakes with Home-made Graham Cracker Crust and Fresh Strawberry Sauce

Standard
Mini Cheesecakes with Home-made Graham Cracker Crust and Fresh Strawberry Sauce

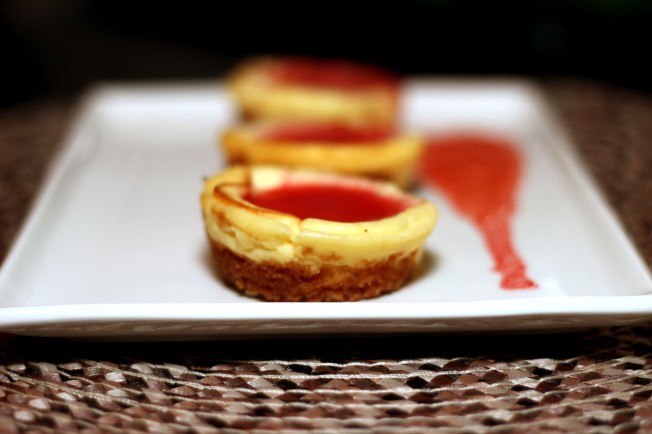
Whew, that title was a mouthful! In keeping with my apparent muffin pan theme lately…on to mini cheesecakes!  These were super simple to make.   Not having to mess with a springform pan was a treat! 🙂  The addition of lemon zest adds great fresh flavor, without being overwhelming.

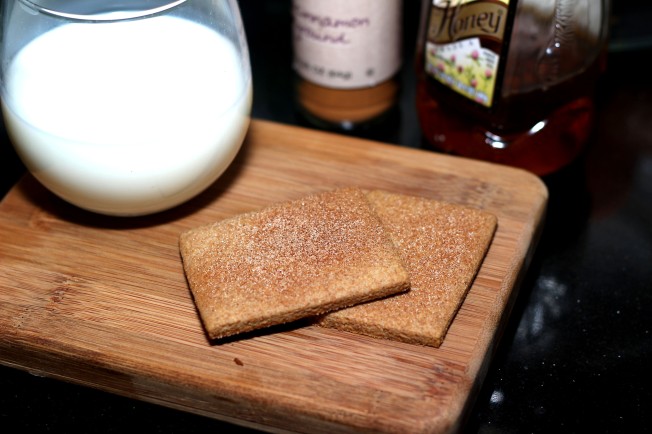
I did double duty with this recipe and made Honey-Cinnamon Graham crackers to use as the base for the crust.  Another new one for me.  Who would have thought one could actually MAKE a graham cracker?!?

mini personal cheesecake with strawberry sauce

The Recipe (makes 12 mini cheesecakes):

Crust:

1/4 cup (1/2 stick butter)

3/4 cup graham cracker crumbs (8 whole graham crackers) If you want to try homemade, find the recipe here

Cooking spray

Filling:

1 lemon

1 pound (two 8 ounce packages) cream cheese, at room temperature

1/2 cup granulated sugar

2 large eggs

1 teaspoon vanilla

1/4 cup heavy cream

Strawberry Sauce:

1 cup frozen strawberries

1/2 cup sugar

1 cup water

The Process:

1.  Preheat the oven to 350 F.  Move an oven rack to the center of the oven.

2.  Spray the muffin tin with the cooking spray, or grease with butter.

3.  Make the crust.  Put 1/4 cup butter in a small saucepan.  Heat over medium heat until the butter is melted.  Remove from the heat and add the graham cracker crumbs.  Stir until they are completely moistened.

4.  Spoon the crumbs into the muffin cups, dividing equally.

5.  Press the crumbs into the bottom of each cup in an even layer.

6.  Make the filling.  Using a small grater or microplane, zest the lemon.  Make sure you don’t dig too deep and get that bitter white in there!

7.  Put the cream cheese and 1/2 cup sugar in the mixer bowl.  Beat on medium speed until creamy and smooth.

8.  Break the eggs into the bowl and beat again until blended.  Pour in the cream, vanilla and add the lemon zest.  Beat again until well blended.

9.  Pour or spoon the mixture evenly into the muffin cups (I used my cookie scoop a little “overfilled” and it seemed to work perfectly).

10.  Bake until the centers are firm, about 18-20 minutes.  To test for doneness, gently shake the muffin tin, if the centers shake, bake for another 3-5 minutes.

11.  Transfer to a cooling rack and allow to cool for 20 minutes.  After they cool, sprinkle the tops with a little additional sugar to prevent the cheesecakes from sticking.

12.  While the cakes are cooling, make the Strawberry Sauce.  Place the frozen strawberries, sugar, and water in a saucepan.  Cook over medium high heat and allow to boil for about 10 minutes.  It should start to thicken slightly.  Remove from heat and using a mesh strainer, strain the mixture into a small bowl.  Allow to cool.

13. Place a large platter over the top of the muffin tin and gently turn both upside down allowing the cheesecakes to drop onto the platter.

14.  Turn the cheesecakes over so the crust is on the bottom, and allow them to chill in the fridge before serving.

15.  Top with Strawberry Sauce if you choose (but why wouldn’t you?!?) 🙂  Serve and impress all your friends with your master baking skills!

Honey Cinnamon Graham Crackers

Standard
Honey Cinnamon Graham Crackers

I grew up on tea with milk accompanied by graham crackers slathered with butter.  My husband thinks I’m weird.  But he puts maple syrup on perogies…so, yeah…who’s the weirdo now? 🙂

I never actually considered the idea of making a homemade graham cracker, Nabisco seems to have a clever market on that.  But I though, hey, why not?  And bonus, I had planned to make some interesting looking Mini Cheesecakes from the book, and I could use these graham crackers for the crust!

These definitely didn’t have the amazing crunch factor I was used to, but the flavor was really similar.  My kid inhaled them without a second thought, so that’s a good sign right?  Maybe if we had let them sit a little longer the crunch would have taken effect?  Hmmm…note to self…don’t let the kid eat all the graham crackers at once…

honey cinnamon graham crackers

The Recipe (makes 24 crackers):

3 tablespoons sugar

1 teaspoon ground cinnamon

1 1/2 cups whole wheat flour (plus 1/2 cup for rolling)

1/2 teaspoon baking soda

1/4 cup (1/2 stick) butter at room temperature

1/4 cup honey

1/2 cup heavy cream

The Process:

1.  Preheat the oven to 350 F and place an oven rack in the center of the oven.

2.  Mix 1 tablespoon sugar and 1/2 teaspoon cinnamon in a small mixing bowl and set aside.

3.  Put 1 1/2 cups flour, the baking powder, and remaining 1/2 teaspoon cinnamon in a medium bowl and stir together.

4.  Put the honey, and remaining 2 tablespoons sugar in the mixing bowl.  Beat on medium speed until smooth and creamy.

5.  Add the flour mixture, half at a time to the mixing bowl and mix on low speed until blended after each addition.

6.  Pour in the cream and mix until dough is smooth.

7.  Sprinkle some of the flour on a clean work surface and turn the dough out of the bowl.  Sprinkle some additional flour on top and spread the dough with your hands.

8.  Roll the dough about a 1/4″ thick.

9.  Using a knife (or pasty cutter, or pizza wheel), cut the dough into 2 1/2″ squares.  Use a spatula to transfer the dough squares onto a cookie sheet.

10.  Bake for 10 minutes.  Remove from the oven and sprinkle with the cinnamon sugar mixture.  Allow to cool (unless you have a toddler nagging you, then the cooling step is optional) before inhaling. 🙂

Baked Manicotti

Standard

My family is half Italian, so I grew up eating all things pasta.  I can still hear my grandfather yelling “mangia” across the table at all the grandkids – basically telling us to eat up…or else…

It’s been awhile since I made a classic stuffed, baked pasta dish, so when I happened upon this recipe in the book, it screamed “make me…or else…”.  The interesting deviance from every manicotti recipe I’ve seen is the addition of mint.  Gave it a fresh flavor – but warning, a little goes a long way.

Gather the family around the table, grab some nice crusty bread, and mangia this one up!

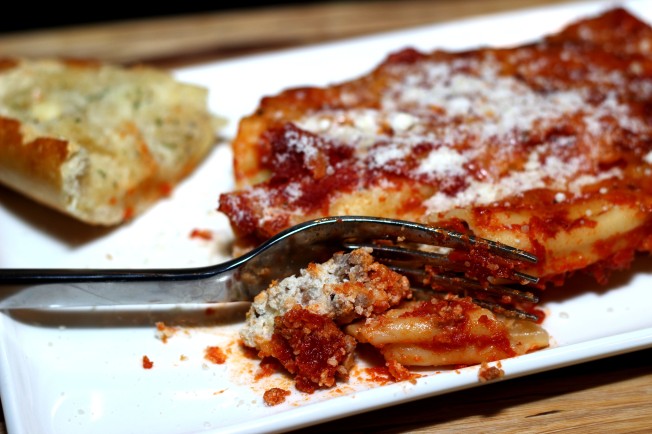
baked manicotti

The Recipe:

6 ounces pork sausage or ground beef

15 oz container ricotta cheese

1 teaspoon dried mint (I used fresh since we have it growing out side, and used about a teaspoon)

1/2 teaspoon dried oregano

1/4 teaspoon nutmeg (I added this…I think it’s been engrained in my psyche that you have to add nutmeg to any cheese stuffed pasta…)

6 ounces mozzarella cheese, grated (about 1 1/2 cups)

1 egg

14 manicotti shells

10 mushrooms (optional)

1 jar of your favorite spaghetti sauce (or gravy if we’re getting technical…)

1/4 cup water

The Process:

*Heat oven to 350F

1.  Cook the manicotti shells per package directions.  Remove when al-dente and place on a plate to cool.

2.  Crumble the pork or ground beef into a frying pan.  Cook over medium-high heat until all the meat is browned, about 4 to5 minutes.

3.  Transfer the meat into a mixing bowl.  Add the ricotta, mint and oregano and stir together.

4.  Grate the mozzarella.  Add about 3/4 cup to the cheese mixture and stir to combine.

5.  Add the egg to the mixture and stir again.

6.  Using a teaspoon, spoon the ricotta filling into the shells.  Place the shells in a 9×13 baking dish as you fill them.

7.  Clean the mushrooms, if using, and roughly chop.  Sprinkle them over the manicotti shells.  Pour the sauce over the shells and then sprinkle the remaining mozzarella over the sauce.

8.  Cover the pan with aluminum foil and seal the edges.

9.  Place in the oven for approximately 1 hour.  Allow to cool for 10 minutes before serving.

Salted Caramel Brownie Bites

Standard

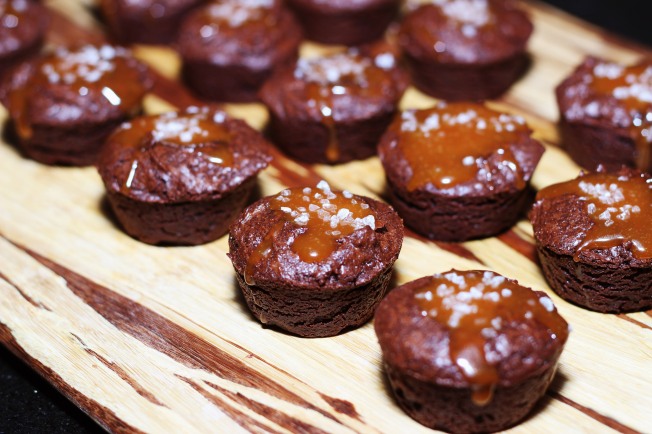
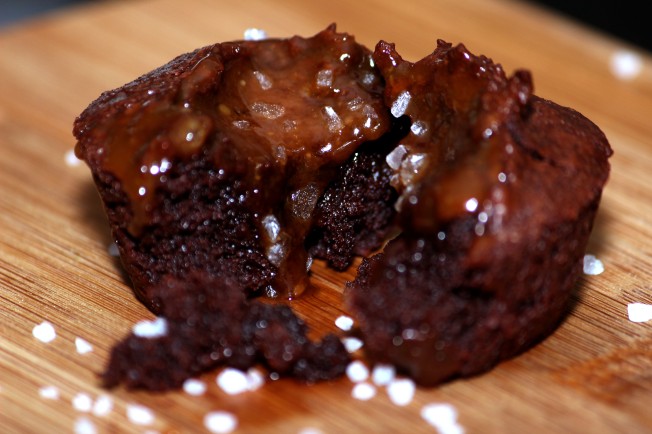
Apparently, I’m mini-muffin pan obsessed this week.  But this recipe warranted it’s second use, nay, demanded it.  Three words people – Salted Caramel Brownie.  Oh yeah, you heard me.  I can’t think of a better combination.  Ooey, gooey salted caramel poured lovingly over a warm, fudgy brownie…it’s food porn at it’s best.  Did I mention I made my own homemade caramel for the first time as well?  Could this day get any better?!?  Why yes, it can.  I have brownies to eat!

salted caramel brownie bite

Check out this luscious bite-sized goodness.

IMG_3587 copy

Recipe adapted from here

The Recipe (makes 20-22 yummy brownie bites):

11 tablespoons unsalted butter, melted

1 1/2 cups granulated white sugar

1 cup unsweetened cocoa powder

1/4 teaspoon salt

1 teaspoon vanilla extract

2 large eggs

6 tablespoons all purpose flour

Caramel sauce:

1/2 cup sugar

2 tablespoons heavy cream

2 tablespoons unsalted butter, cut into 1/2-inch pieces

Flaky sea salt

The Process:
  1. Preheat oven to 350 degrees F.
  2. Spray mini muffin cups with non stick baking spray.
  3. In a medium mixing bowl using a rubber spatula, mix together melted butter, sugar and salt. Once combined mix in your egg and vanilla extract. Add in cocoa powder and flour, scraping down the sides of the bowl just until all the ingredients have come together. Using a cookie scooper or tablespoon. Fill greased mini muffin cups about 3/4 of the way.
  4. Bake for about 15 minutes or until a toothpick is inserted in the center and comes out clean.
  5. Allow brownie bites to cool before removing from the muffin tin.
  6. While the brownies are cooling, make the caramel sauce.  Recipe from here.
    • Bring sugar and 2 tablespoons water to a boil in a small saucepan over medium heat, stirring until sugar dissolves. Increase heat to medium-high and cook without stirring, occasionally swirling pan and brushing down sides of pan with a wet pastry brush, until sugar is a deep amber color, 5-8 minutes. Remove caramel from heat.
    • Add cream and butter (mixture will bubble vigorously) and whisk to combine. Let cool slightly in pan.  Add a little more cream if the caramel appears too thick to pour.

    7.  Using a spoon, make a slight depression in the tops of the brownies and pour a small amount (or large amount depending on your mood…) over the brownies.  Sprinkle with sea salt.  Sit back and enjoy the sweet chocolate ride…

Easy Baked Doughnut Nuggets (made in a mini-muffin pan, how clever!)

Standard
Easy Baked Doughnut Nuggets (made in a mini-muffin pan, how clever!)

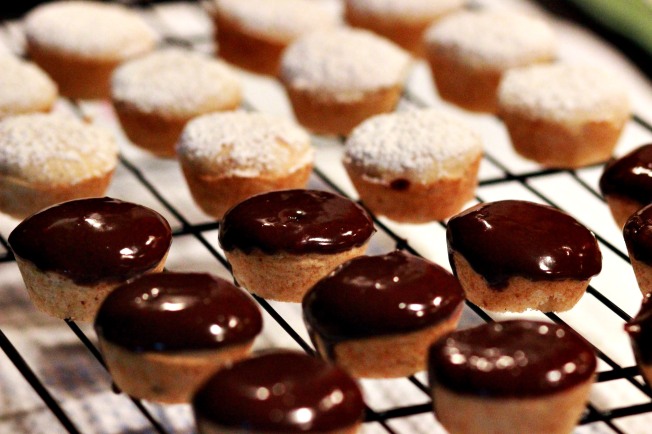
Ok, I won’t lie, if you’re expecting Krispy Kreme-type gooey fried doughnut goodness, you’ve come to the wrong recipe.  These are cake doughnuts.  But the good news is, they’re baked – so you don’t have to hide alone in a dark corner and consume them in total shame 🙂  The flavor is really tasty, and I love the slight crunch to the outside and light, fluffy texture inside.  And a nice bonus not to have to roll out dough and cut into circles.  The original recipe calls for a Cinnamon-Sugar dusting, but I couldn’t imagine a doughnut without a chocolate glaze – so I made some of both.  For science, you know?

baked doughnut nuggets

The Recipe (makes 30 doughnuts in a mini muffin pan):

1 1/2 cups all-purpose flour

2 teaspoons baking powder

1/2 teaspoon nutmeg (I cut mine to 1/4 teaspoon since I always feel nutmeg can be overpowering)

1/2 teaspoon salt

1/2 cup (1 stick) butter, at room temperature

1/2 cup sugar

1 large egg

2/3 cup milk

Cinnamon Sugar Topping:

2 tablespoons powdered sugar

1/4 teaspoon cinnamon

Chocolate Glaze Topping:

3/4 cup powdered sugar

2 tablespoons unsweetened cocoa powder

2 tablespoons milk

1 teaspoon pure vanilla extract

The Process:

1.  Preheat the oven to 350 F (325 F if using a dark pan).  Grease or spray a mini-muffin pan.

2.  Place the flour, nutmeg, salt and baking powder in a bowl and stir to combine.  Set aside.

3.  Place the butter and sugar in your mixing bowl and beat on medium-high speed until light and fluffy.

4.  Break the egg into the bowl and mix again until thoroughly incorporated.

5.  Add half the flour mixture and mix until smooth.  Add half the milk and mix again.

6.  Add the remaining flour and milk and mix again until smooth.

7.  Using a spoon, fill each muffin cup about 2/3 full with batter.

8.  Bake for 15-20 minutes.

9.  Remove from oven and transfer doughnuts to a cooling rack.  Allow to cool completely.

10.  While the doughnuts are cooling, make the toppings.

For the Cinnamon Sugar: Place the powdered sugar and cinnamon in a bowl and stir to combine.

For the Chocolate Glaze: Place the powdered sugar and cocoa powder in a bowl.  Slowly add in the milk and whisk until smooth.  Add in the vanilla and whisk again.  Add a little more milk if the glaze seems too thick.

11.  When the doughnuts are cool, sprinkle them with the cinnamon sugar and/or dip in the chocolate glaze.

Inspiration finds me in the strangest places

Standard

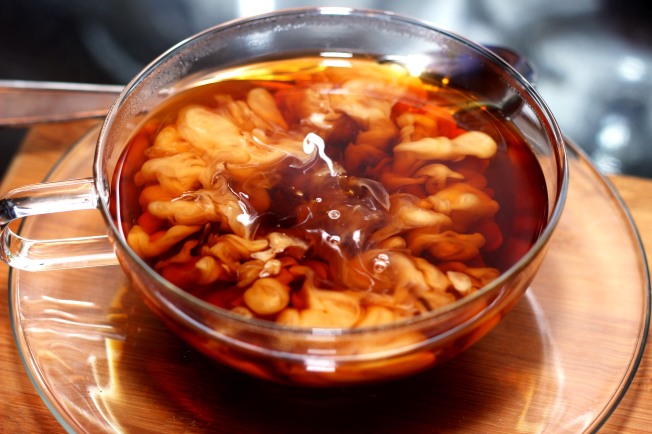
Have I mentioned I’m in love with an inanimate object?  A camera, that is, don’t get all weird on me.  I find I look at things differently since I started practicing photography – everything is about composition, how colors relate to each other, the patterns simple objects make.  I needed a late afternoon pick-me-up one day and noticed that cream makes beautiful, billowy swirls in coffee when it’s first poured.  See what I mean?  Totally mundane, but somehow I found beauty in it – and was forced to photograph it 🙂

coffee creamer